| Open Microsoft Outlook 2013. |
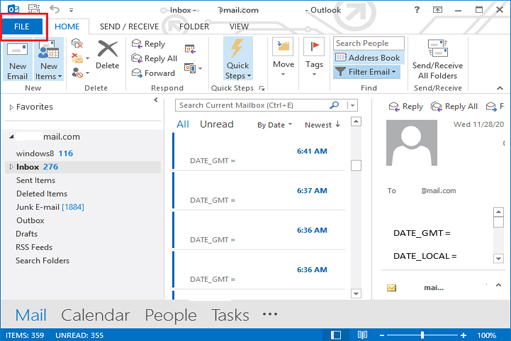
| Step 1. Open Outlook and select File. |
|
 |
|
|
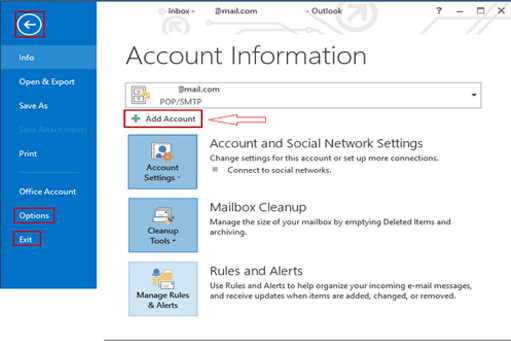
| Account Information |
| Step 2. Click the Add Account button, from Info tab. |
|
 |
|
|
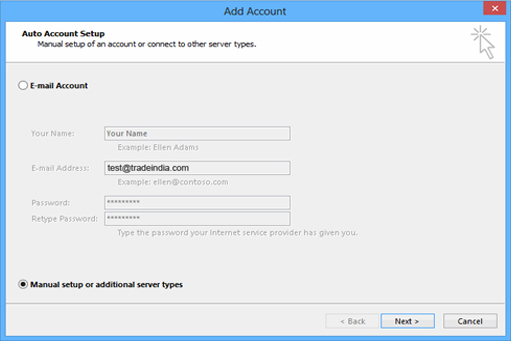
| Auto Account Setup |
| Step 3. Enter your name, Email id, Password and Select Manually configure server settings or additional server types, and click Next. |
|
 |
|
|
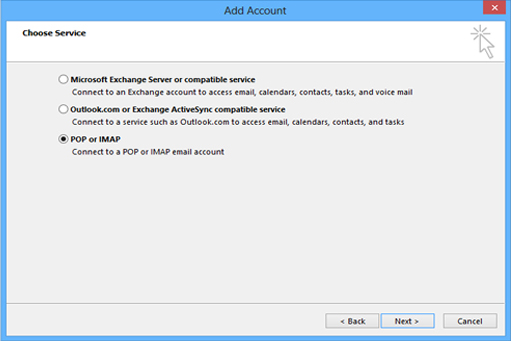
| Choose Service |
| Step 4. On the Choose Service, select POP or IMAP, and then click Next. |
|
 |
|
|
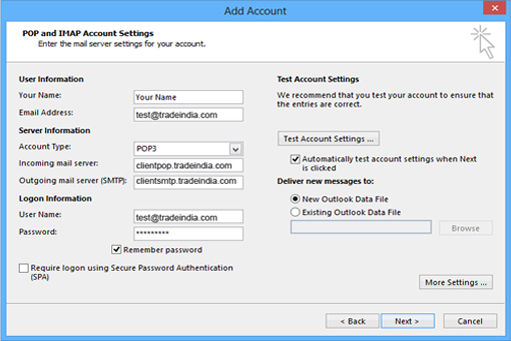
| POP and IMAP Account Settings |
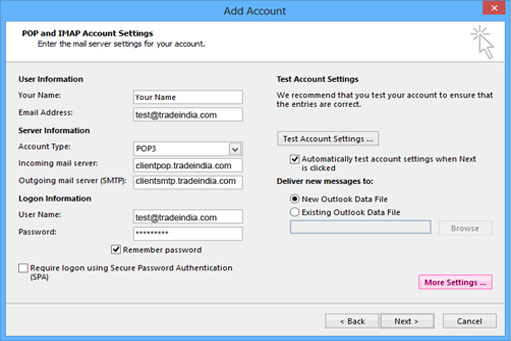
Step 5. Enter the following information for E-mail Accounts:
|
| Your Name: Enter the name want your e-mail to display when someone receives your message.
E-mail Address: Type your complete e-mail address, for example test@tradeindia.com
Account Type: POP3
Incoming mail server: Type clientpop.tradeindia.com
Outgoing mail server (SMTP): clientsmtp.tradeindia.com
User Name: Type your complete e-mail address. For example test@tradeindia.com
Password: Type in your password for the e-mail address entered above, and check the remember password box. |
After enterring above information, Please click on the 'More Settings' button in the bottom right hand corner..
|
|
 |
|
|
| Internet E-mail Settings |
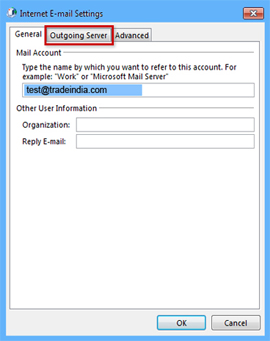
| Step 6 . Click the Outgoing Server tab |
|
 |
|
|
| Internet E-mail Settings |
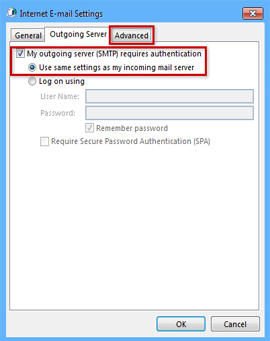
| Step 7. Select the box labeled My outgoing server (SMTP) requires authentication, then choose Use same settings as my incoming mail server. |
|
|
 |
|
|
| Internet E-mail Settings |
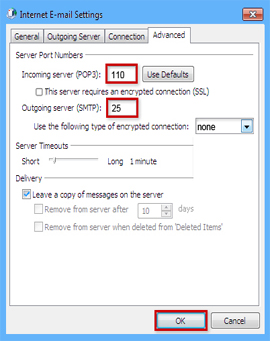
| Step 8. Click the Advanced tab. |
| Under Incoming Server (POP3), the port number should be 110.
Under Outgoing Server (SMTP), the port number should be 25.
Use the following type of encrypted connection, Select none
Select check box Leave a copy of messages on the server
Click the OK |
|
 |
|
|
| POP and IMAP Account Settings |
Step 9. Click Next
|
|
 |
|
|
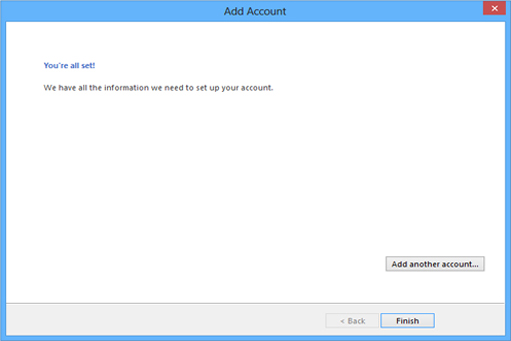
| Step 10. Click on Finish Button, and now you are ready to receive and send mails. |
|
 |
|
|