| Step-by-step instructions for setting up email on an iPhone |
|
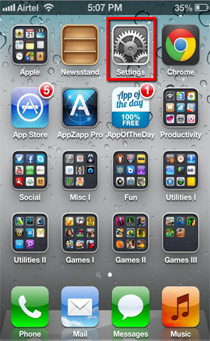
| Home Screen |
| Step 1. Tap on the Settings icon. |
|
 |
|
|
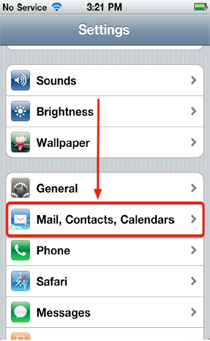
| Settings |
| Step 2. Tap on Mail, Contacts, Calendars. |
|
 |
|
|
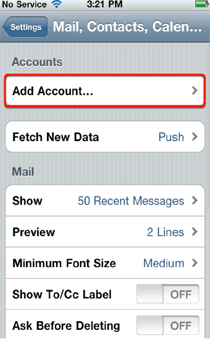
| Mail, Contacts, Calendar |
| Step 3. Tap on Add Account. |
|
 |
|
|
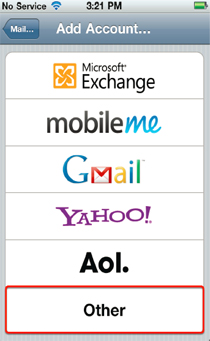
| Add Account |
| Step 4. Tap on Other. |
|
 |
|
|
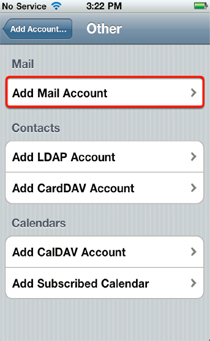
| Other |
Step 5. Tap on Add Mail Account.
|
|
 |
|
|
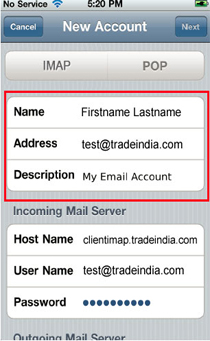
| New Account |
Step 6. Enter your name, the email address you wish to add and the email address password. You can now enter a description to help recognise the email account. Once this is done tap on Next.
|
|
 |
|
|
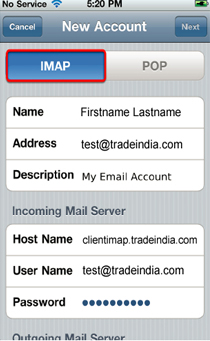
| New Account |
| Step 7. Tap on IMAP |
|
 |
|
|
| New Account |
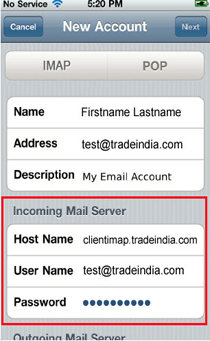
Step 8. Enter the following information for the Incoming Mail Server:
|
| Host Name: clientimap.tradeindia.com
User Name: Enter your email Address
Password: Enter your email password |
|
 |
|
|
| New Account |
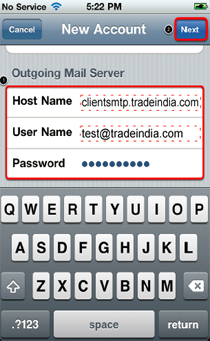
Step 9. Enter the following information for the Outgoing Mail Server:
|
| Host Name: clientsmtp.tradeindia.com
User Name: Enter your email Address
Password: Enter your email password |
|
 |
|
|
| Verifying |
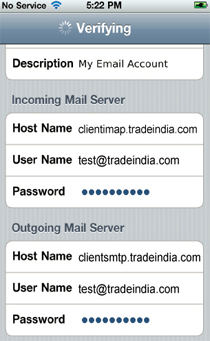
Once this is done tap on Next button in the top right hand side of the screen.
|
|
 |
|
|
| Cannot Connect Using SSL |
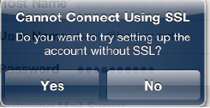
| Step 10. A message will appear saying: "Cannot Connect Using SSL. Do you want to try setting up the account without SSL?" Click on "Yes" |
|
 |
|
|
| IMAP |
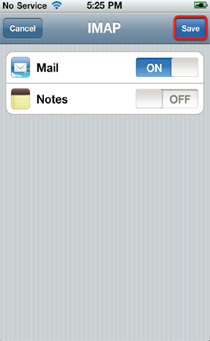
Step 11. Press the "Save" button in the top right hand side of the screen.
Step 12. Make sure Mail is switched ON and then tap on Save.
Step 13. Go back to the homescreen and tap on Mail.
Setp 14. You can now start sending and receiving email straight away. |
|
 |
|
|

 07971190770