| Step-by-step instructions for setting up email on an Android (HTC/Samsung/Sony/Google/LG/etc) |
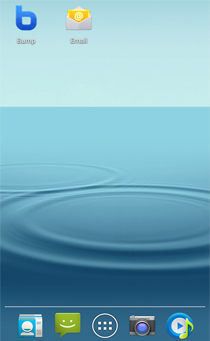
| Home Screen |
| Step 1. From the Home screen, tap the Application button and then tap the Email icon. |
|
 |
|
|
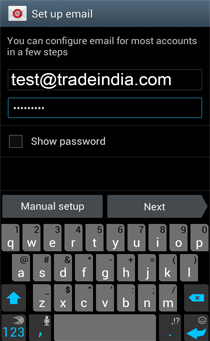
| Set up email |
| Step 2. Enter your full email address and password, Then tap on 'Manual Setup' |
|
 |
|
|
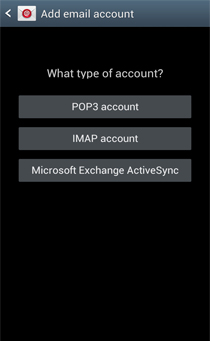
| Add email Account |
| Step 3. For the Account type, select IMAP. |
|
|
 |
|
|
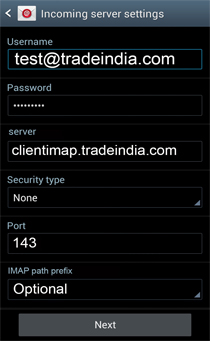
| Incoming Server Settings |
Step 4. For the Incoming settings, please enter the following information for the Incoming Mail Server:
|
| User Name: Enter your email Address ( Ex: test@tradindia.com)
Password: Enter your email password
IMAP Server: clientimap.tradeindia.com
Security Type : None
Port : 143 |
|
 |
|
|
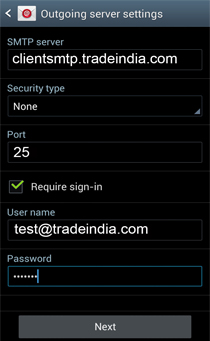
| Outgoing Server Settings |
Step 5. For the Outgoing settings, please enter the following information
|
| SMTP Server : clientsmtp.tradeindia.com
Security Type : None
Port : 25
Require sign-in: Select Check Box
User Name: Please enter your full email address
Password: The password for your email address.
Click Next. |
|
 |
|
|
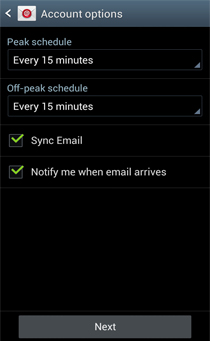
| Account Options |
Step 6. Email Checking Frequency / Set how often you would like your device to check for new emails.
Note: The more often you check your email the more drain it will cause on your battery.
Notify me when email arrives: Leave this checked if you would like to be notified of new email messages.
Tap Next.
|
|
 |
|
|
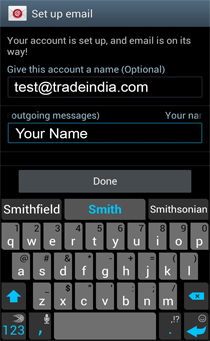
| Setup email |
Step 7. If you would like you can name the email account, this can be helpful if you have multiple accounts on the one device an enter your name you would like to be shown on all outgoing emails that you send from the device.
Tap Done.
Step 8. You can now start sending and receiving email straight away. |
|
 |
|
|

 07971190770